Booking Tables
| At the end of this topic, you will be able to: ◾Book a table for customers ◾Understand how online booking works via NEON APP |
Booking a table on NPOS
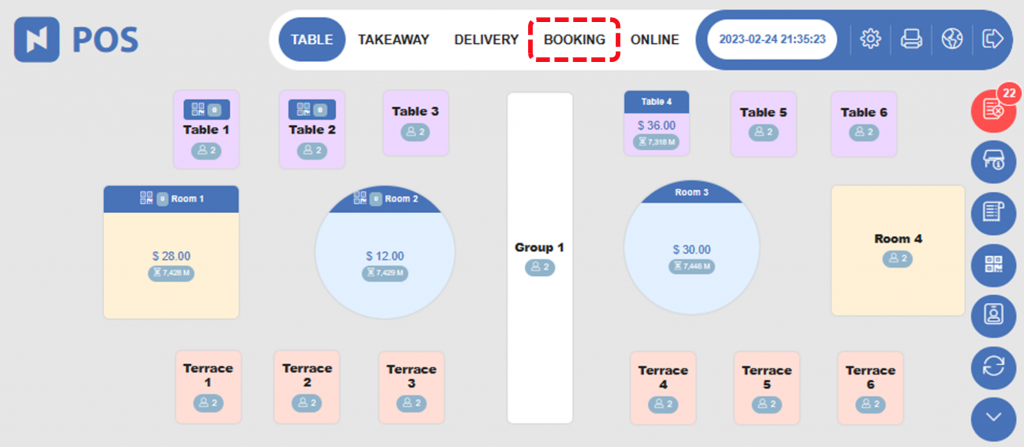
[1] Click BOOKING on NPOS.
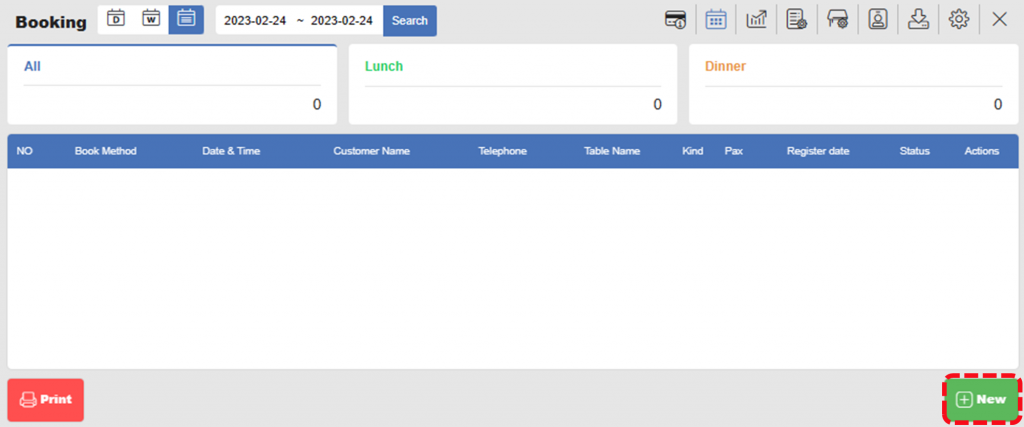
[2] Click  New.
New.
[3] Enter booking information and click  Confirm.
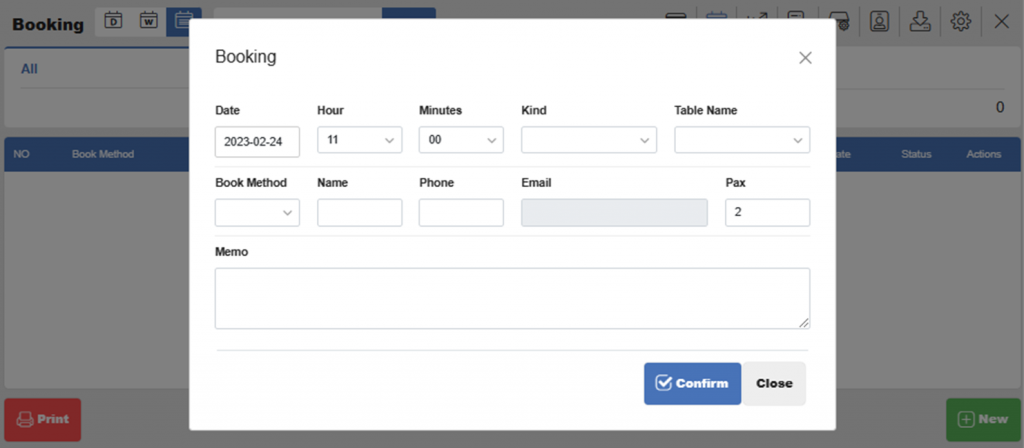
| Notes Date Reservation date Hour and Minutes Reservation time Name Customer’s name Kind Specify whether it is Breakfast, Lunch, or Dinner Table Name Assign table for the reservation Book Method NEON will be appeared if the booking is made via NEON Phone Customer’s phone number Pax Number of customers Memo Any memo that is necessary for booking. Normally, this field is used to put a special request of customers. |
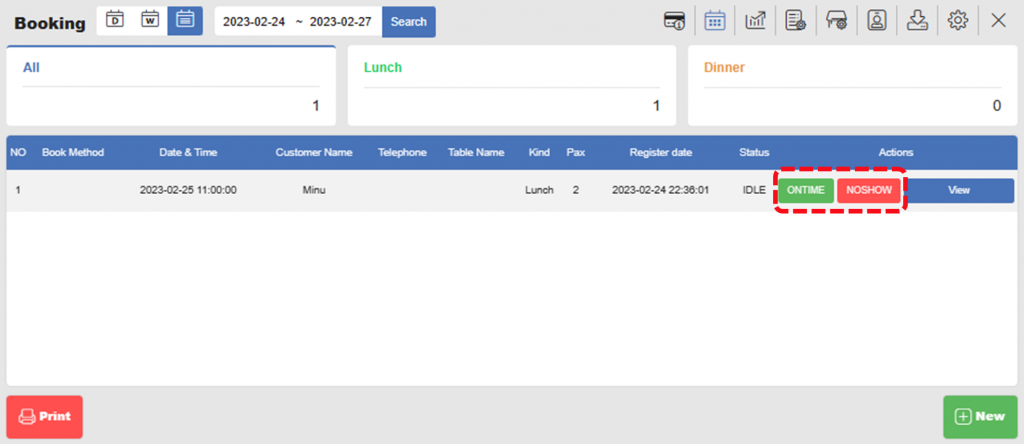
[4] The booking should appear in the list.
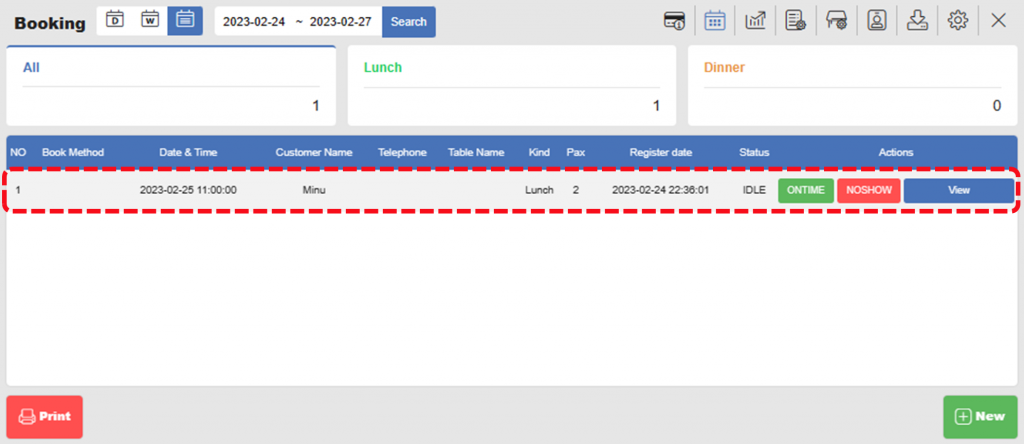
[5] Click either ONTIME or NOSHOW to process booking (ONTIME if customers visited and NOSHOW if customers didn’t show up)
Booking a table via NEON APP
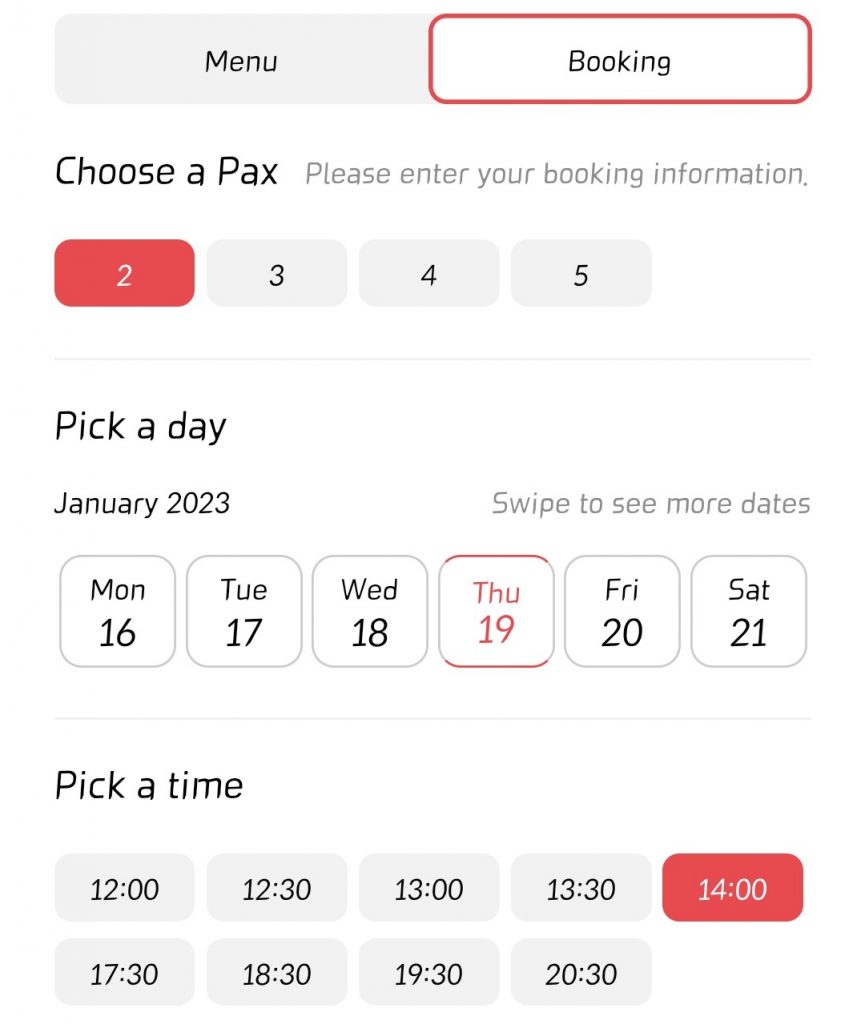
Through NEON APP, customers can book a table by themselves. Customers can search your restaurant in NEON APP with their smartphone and connect to your page.
By scrolling down, customers can book a table by entering Pax, booking date and time.
Further scrolling down, customers are requested to enter name, contacts, and memo for booking.
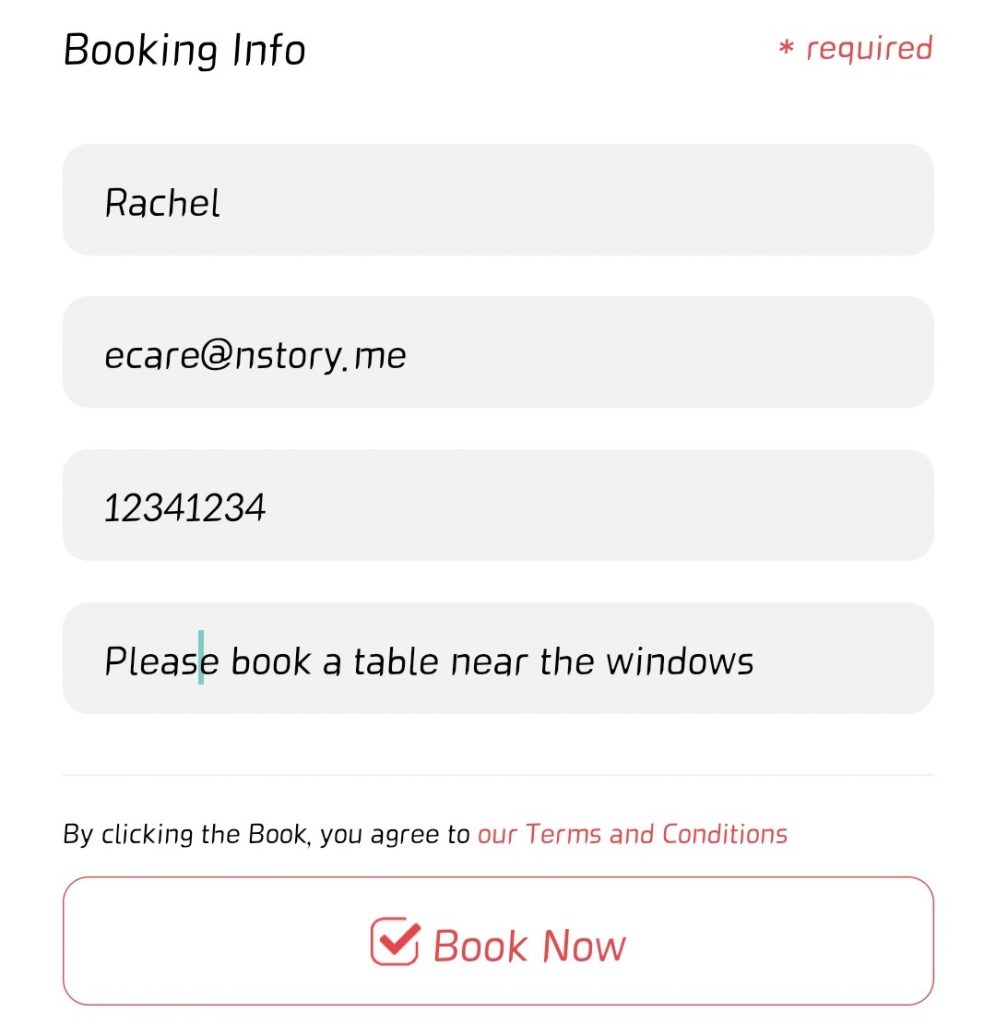
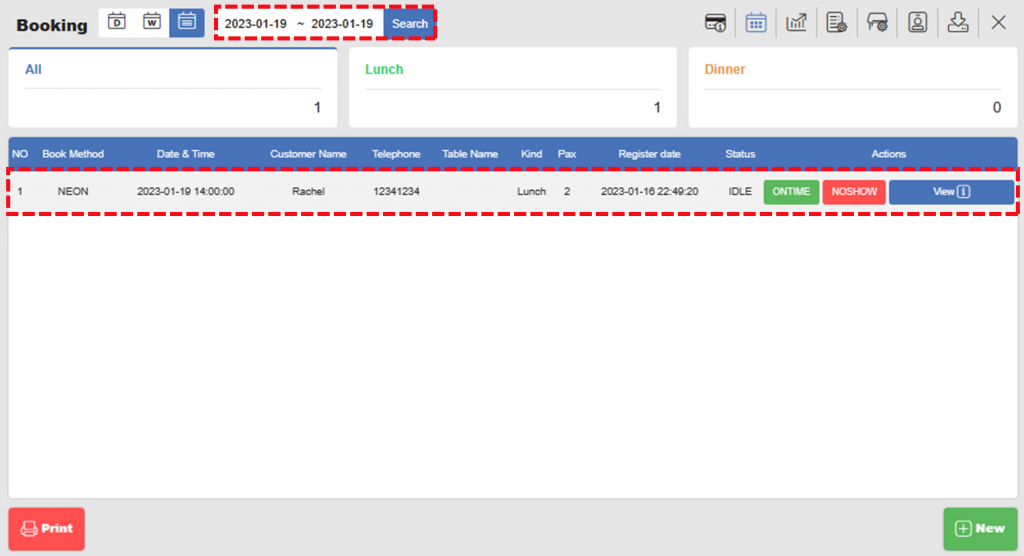
By clicking Book Now, NEON APP will transfer the booking information to NPOS.
Related pages
◀️ Go back to NPOS Manual
◀️ Go back to NPOS Guide for Front Staff
Last Updated on 24-Feb-2023

One Reply to “Booking Tables”