Getting started to Reservation
By activating Reservation service in NEON, customers can reserve a table on their own. This feature will not only save time and efforts for your staff, but also help prevent any mistakes.
To use Reservation service, take the following steps.
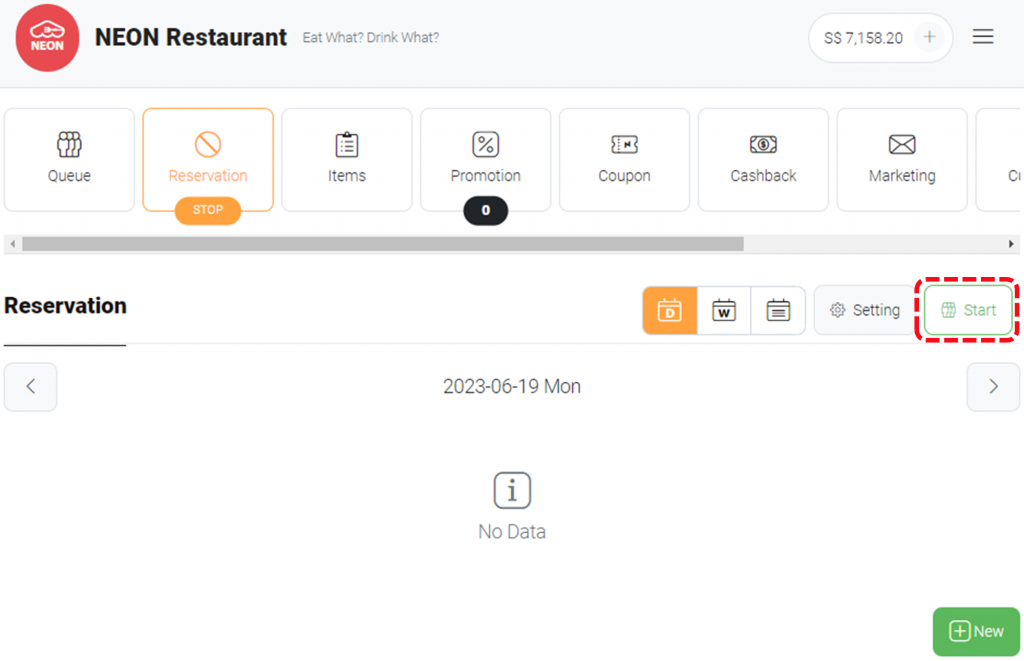
[1] On main page, click Reservation.

[2] Check if Reservation is activated. If the service is not activated, there will STOP sign below the icon.


[3] If you see STOP sign on the icon, click  Start to use open the service.

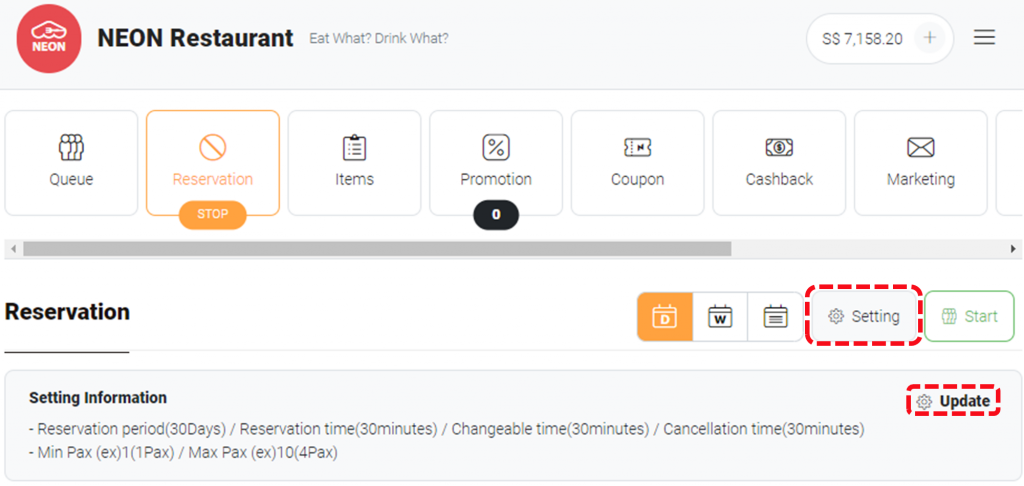
[4] Click  Setting >
  Update.

| NOTE: You can find summary of current settings at Setting Information section. |
[5] To start using the reservation service, the following parameters must be set .
- Reservation period Maximum days customers can reserve in advance.
Ex) If 30 days are entered, customers can reserve up to 30 days from today. - Reservation time Minimum time before reservation time that customers can make reservation
Ex) If 30 mins specified, customers can make reservation at 6:00 PM slot until 5:30 PM. - Changeable time Minimum time needed for customers to modify reservation
Ex) If 30 mins is specified and a customer has existing reservation at 5:00 PM today, the customer can modify the reservation until 4:30 PM. - Cancellation time Minimum time needed for customers to cancel their reservation
Ex)If 30 mins is specified and a customer has existing reservation at 5:00 PM today, the customer can cancel the reservation until 4:30 PM. - Time interval Reservation time slots will be generated with a specified interval
Ex) If you specify 30 mins, time slots will be generated every 30 minutes – 17:00, 17:30, 18:00.
[6] Go to Reservation Day of Week and click  Add.
Add.
[7] Choose days to open reservation. Only selected days will be available for reservation.

[8] Choose time range for reservation.

