Add, Edit, and Arrange Categories
After learning this topic,
🔹You will learn how to add, edit categories
🔹You will learn about category settings
Before you use NPOS, you need to organize items by category. Let’s say you have three items – Curry Udon, Orange Juice, and Chamomile Tea. And you would want to categorize like below:
🔹Curry Udon – Hot Noodle
🔹Orange Juice – Cold Beverage
🔹Chamomile Tea – Hot Beverage
Adding Category
Main screen > Click ⚙️ icon > Click Menu Setting

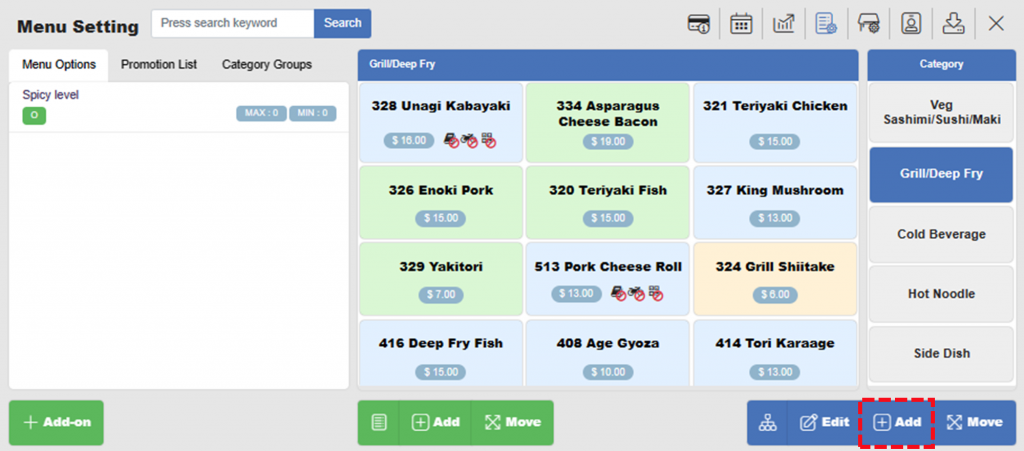
> Click Add

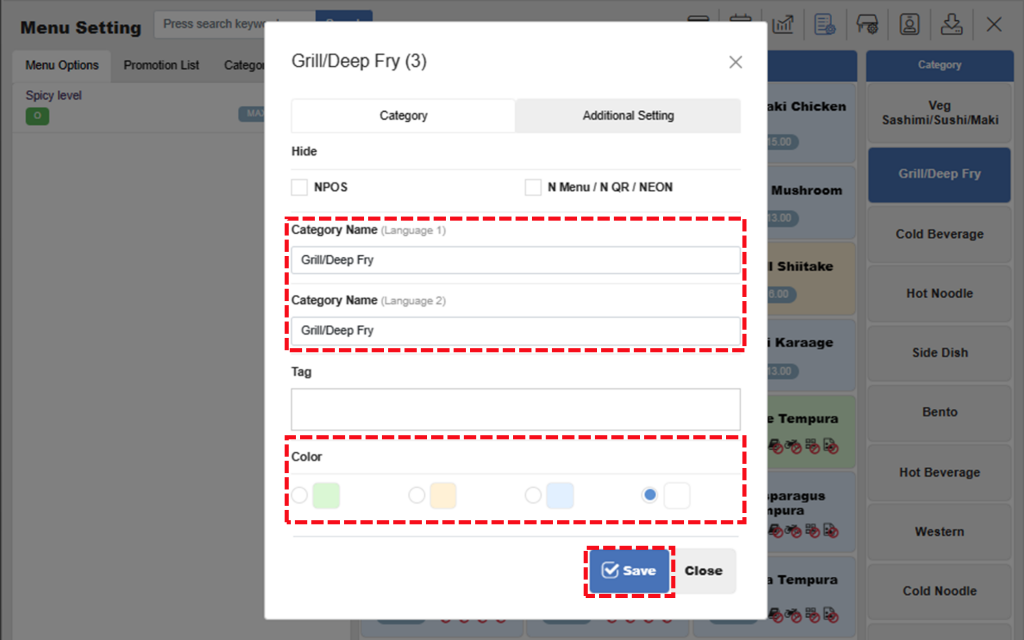
> Enter Category name in both language
> Select Color
> Click Save

Note: Both Category Name must be filled. If you only use one language, please fill the same in both fields.
Editing Category
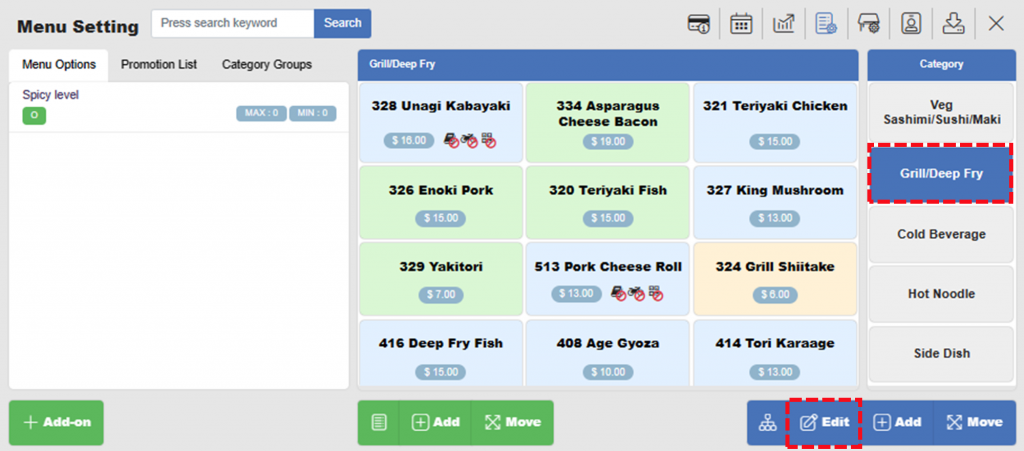
Select Category > Click Edit

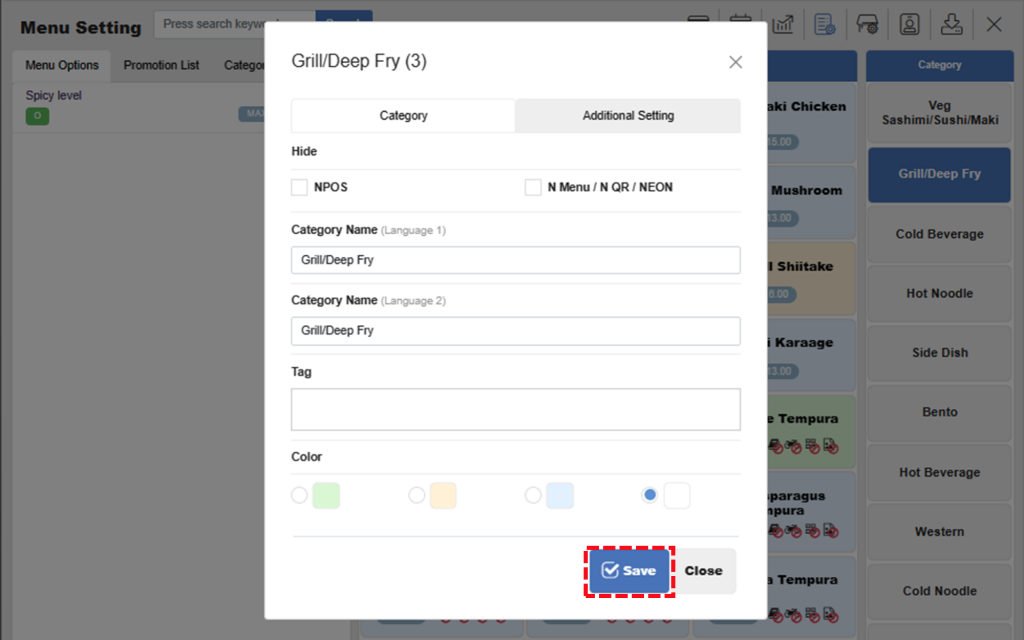
> Update information and click Save

Other Setting – Category Tab
1. Hide
Under Category tab, check the box if you want to hide the category in the system. You can hide category in NPOS or N Menu / N QR / NEON.

2. Tag
You can add Tag for the category.

Additional Setting
1. Category Image
Setting a category image is entirely optional. The category image is only displayed when customers self order through the digital menu. If you are not using our digital menu, you may skip this step.

2. Promotion Discount (%)
You may set a promotion discount % to specific categories which will be automatically applied to all items within the menu category.

3. Available Time
Set the time that the category will appear on the menu. You can either use preset Breakfast, Lunch, and Dinner or directly specify time.

4. N-menu / N-QR List Style
There are 4 different screen layouts you can choose. This setting applies only to businesses using our digital menu and self ordering service N-menu.

5. Category description
You may choose to input a short description of your menu categories so that in the event your staff needs to add a new menu item in the future, they can know which menu category to add the item to.

Related Pages
◀️ Go back to NPOS Customization
Last updated 31 Dec 2022

One Reply to “Add, Edit, and Arrange Categories”