Setting Table Layout Style
After learning this topic,
🔹You will know differences between Table Style and Map style
🔹You can switch your table layout to Table Style or Map Style.
Table Layout:
Table Style vs Map Style
Once you logged in NPOS, you can see tables where you can add orders for dine-in customers. NPOS supports two types of layout – Table Style and Map Style.
In Table Style, tables are shown side by side. This can be sufficient for stores having small number of tables.
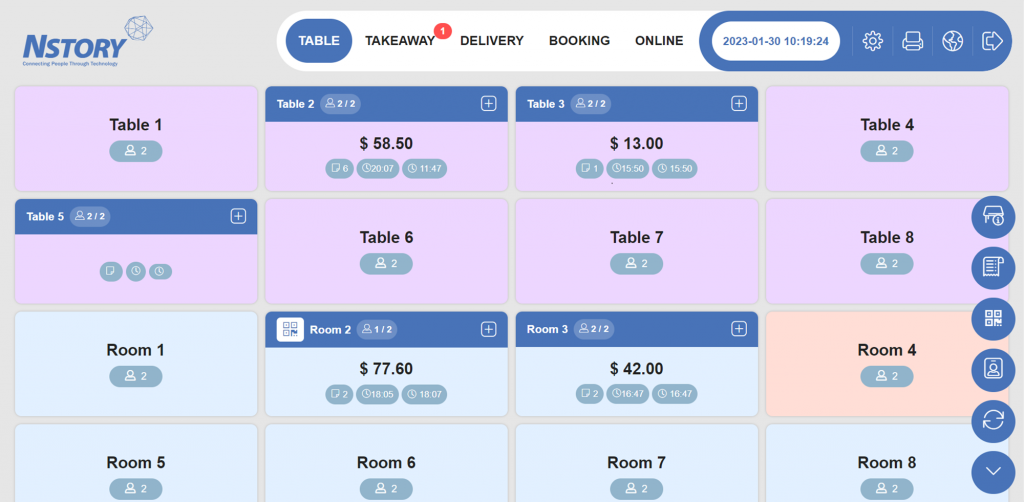
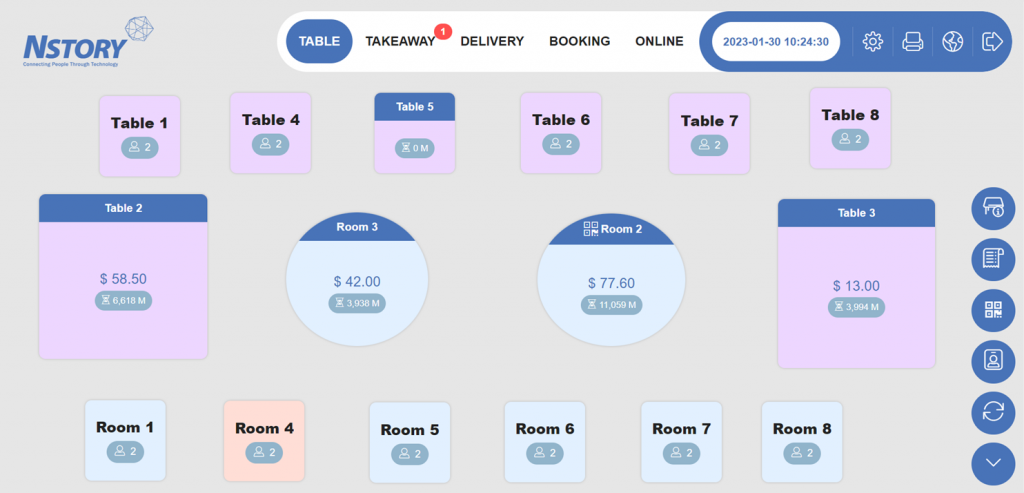
In Map Style, Tables can be arranged as similar as physical layout of the store. You can adjust table shape and size and arrange the table with drag & drop. This is useful when the store size is large and the store have many tables.
Switching Layout Style
Step 1 – On main screen, click ⚙️.
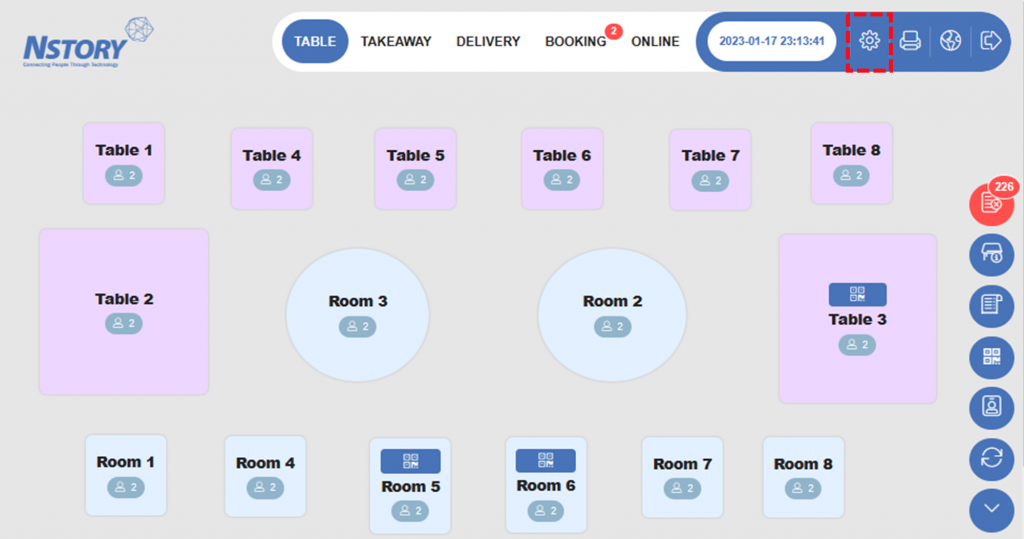
Step 2 – Click multiple times on the upper empty space to enter Detail Setting.

Step 3 – Scroll down to locate Table Setting. Or click Table Setting on the left bar.
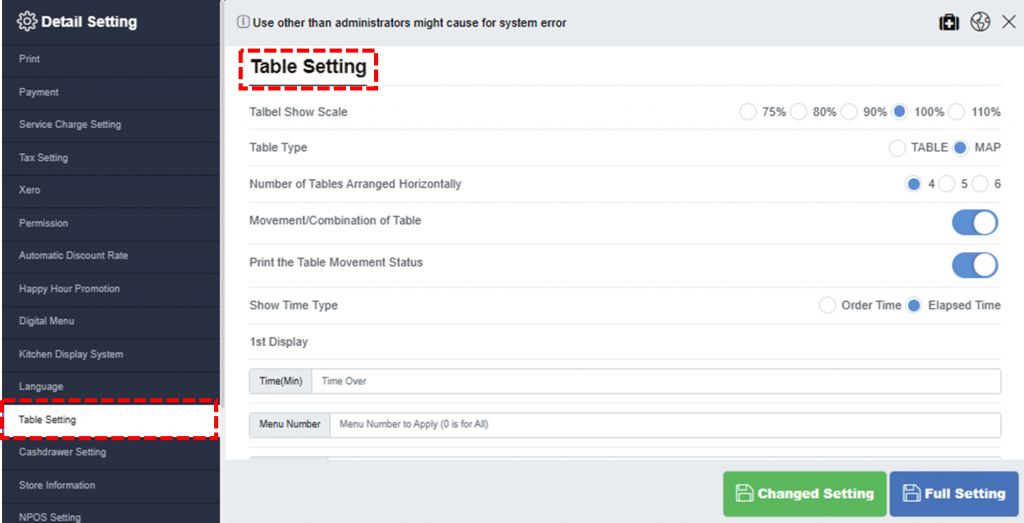
Step 4 – On Table Type, click TABLE for Horizontal Style and MAP for Map Style.
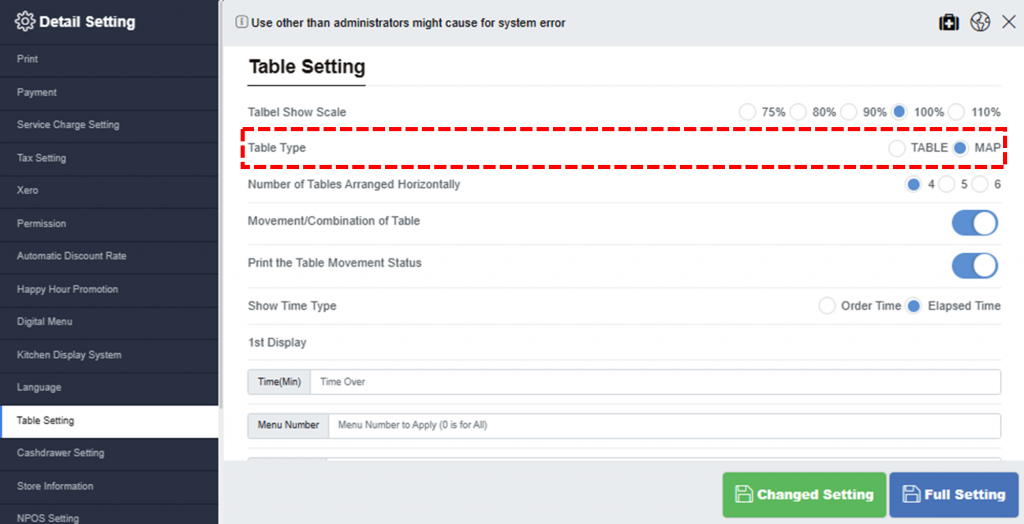
Table Setting Options
On the same page, you can adjust table setting.
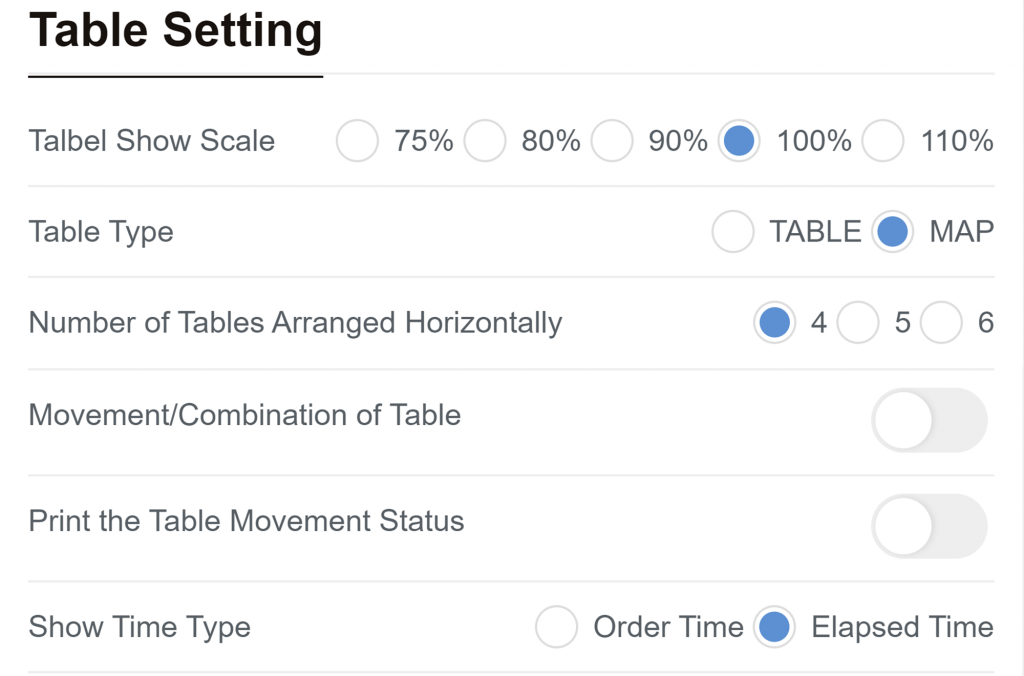
- Table Show Scale
Select size of the tables on the screen. - Table Type
Choose the layout – Horizontal Style or Map Style - Number of Tables Arranged Horizontally
This option is for Horizontal Style. - Movement/Combination of table
By turning on this option, you can drag and drop the tables on the main screen to change the location or combine - Print the Table Movement Status
Outputs the table movement status. - Show time type
Each table shows the time either when the customers placed an order (Order Time) or how long they have stayed (Elapsed Time).
The below image is an example when using Order Time option. Time ordered will be shown under the order amount.

Related Pages
◀️ Go back to NPOS Customization
Last updated on 31 Jan 2023

One Reply to “Setting Table Layout Style”