Giving a Discount on Items
| At the end of this topic, you will be able to: ◾Understand type of discounts ◾Give discounts to items |
There may be times you want to give discounts to customers or they are eligible for certain discounts. You can use one of the following discounts:
- Item Discount
- Total Discount
- Discount Group
Item Discount
Item Discount is to give a discount to selected items.
[1] On Payment screen, select an item and Item Discount.
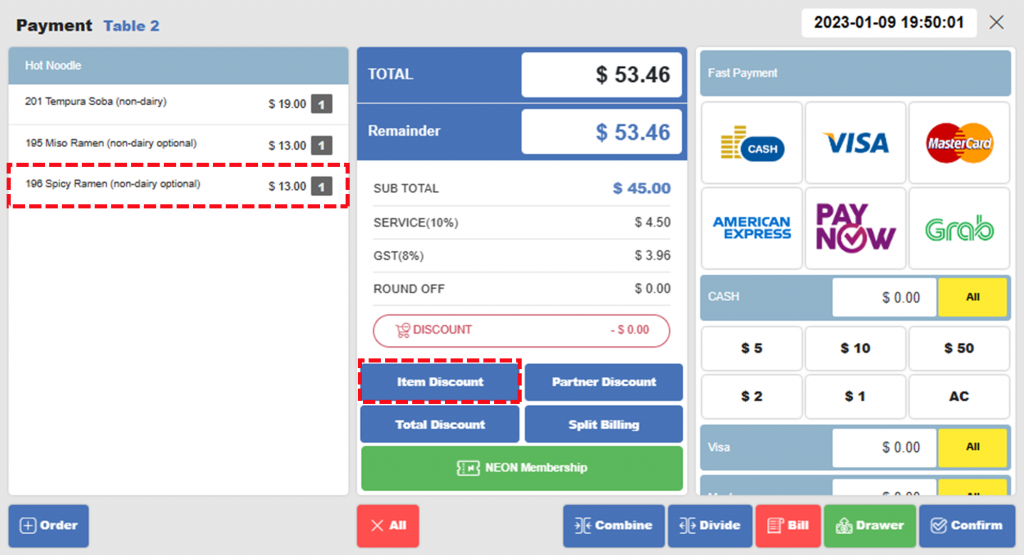
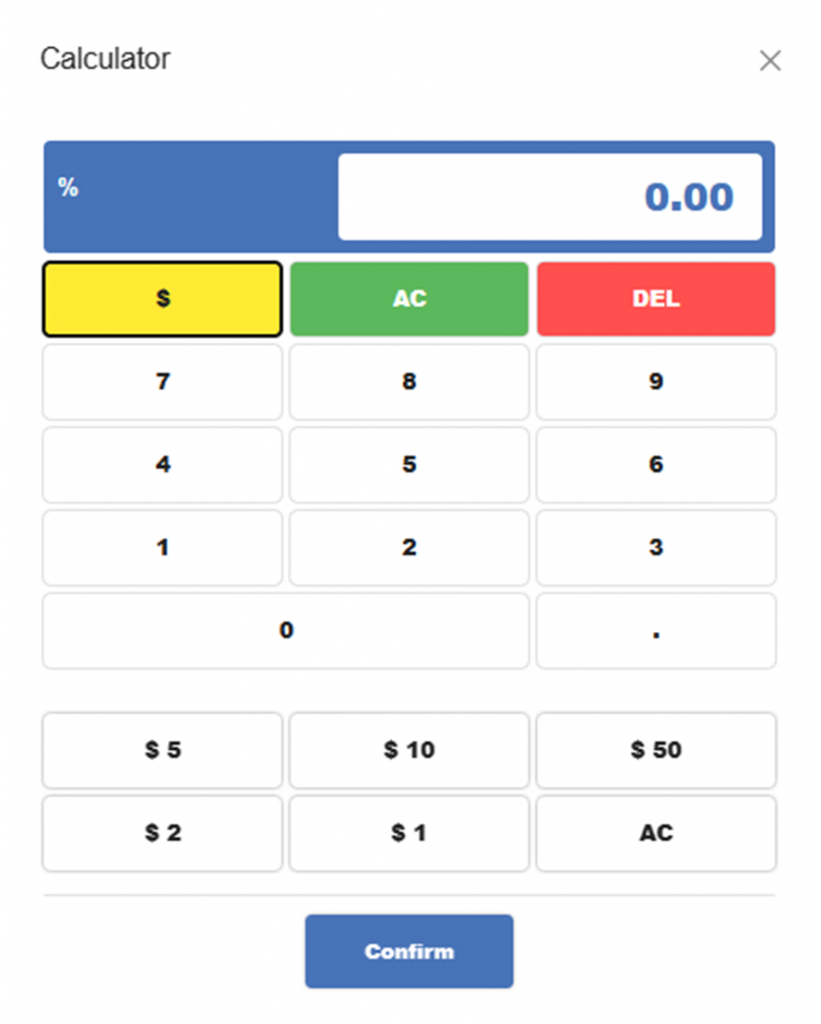
[2] Enter discount amount ($) or percentage (%) and click Confirm.
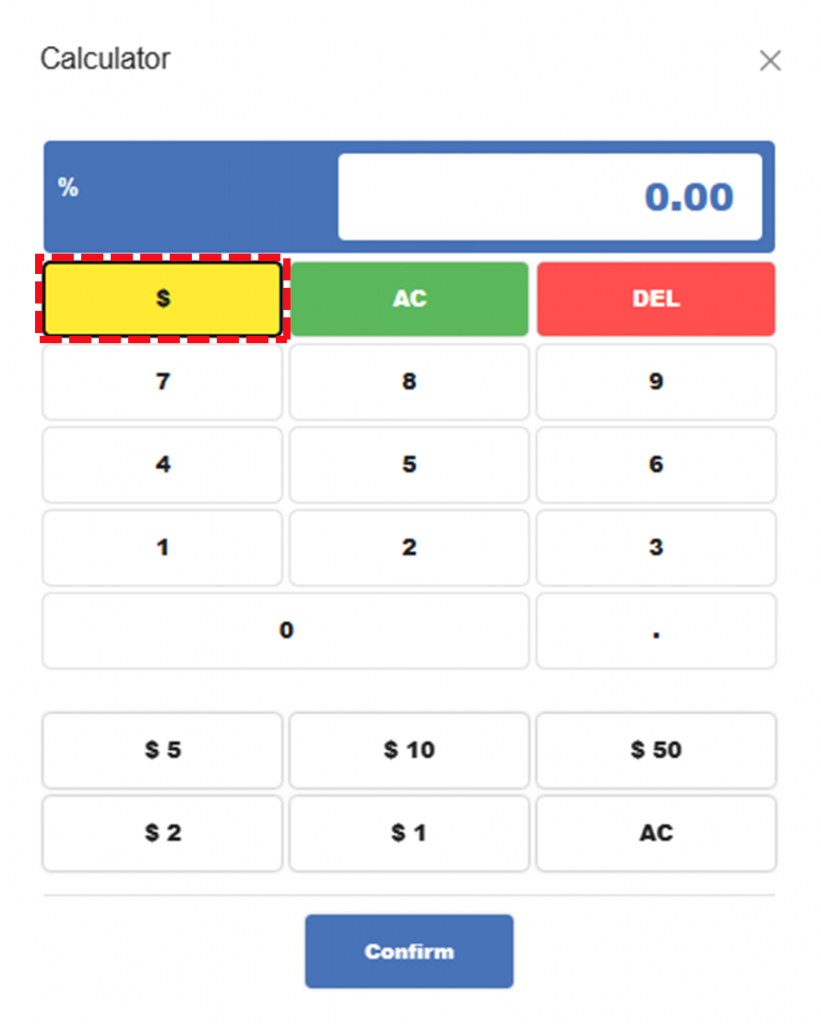
| Notes Click yellow button to toggle $ mode and % mode. ◾In $ mode, specify discount amount (ex. put 5 to give 5 $ discount) ◾In % mode, specify discount percent (ex. put 5 to give 5% discount) |
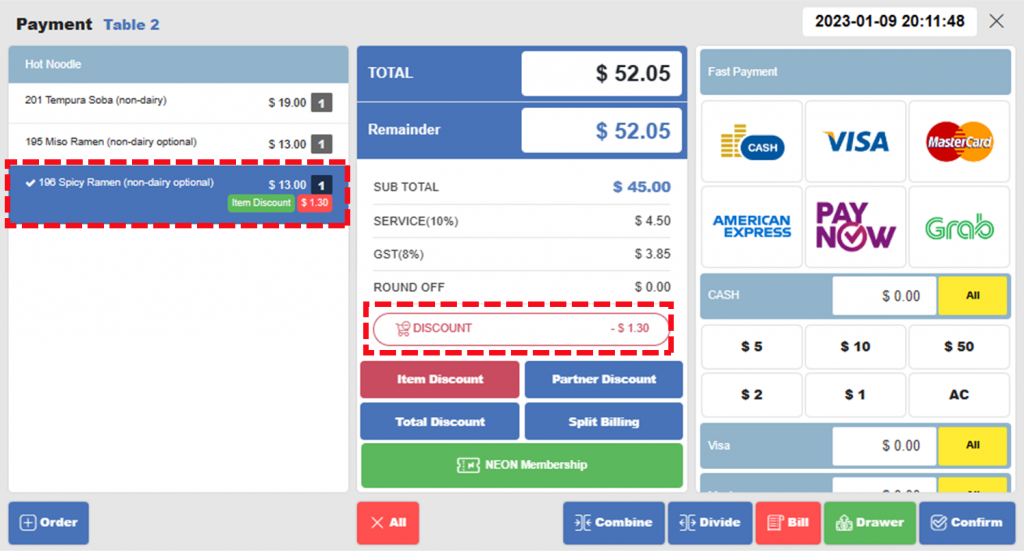
[3] Item Discount is applied.
Total Discount
Total Discount is to give a discount on the total price.
[1] Click Total Discount on Payment screen.
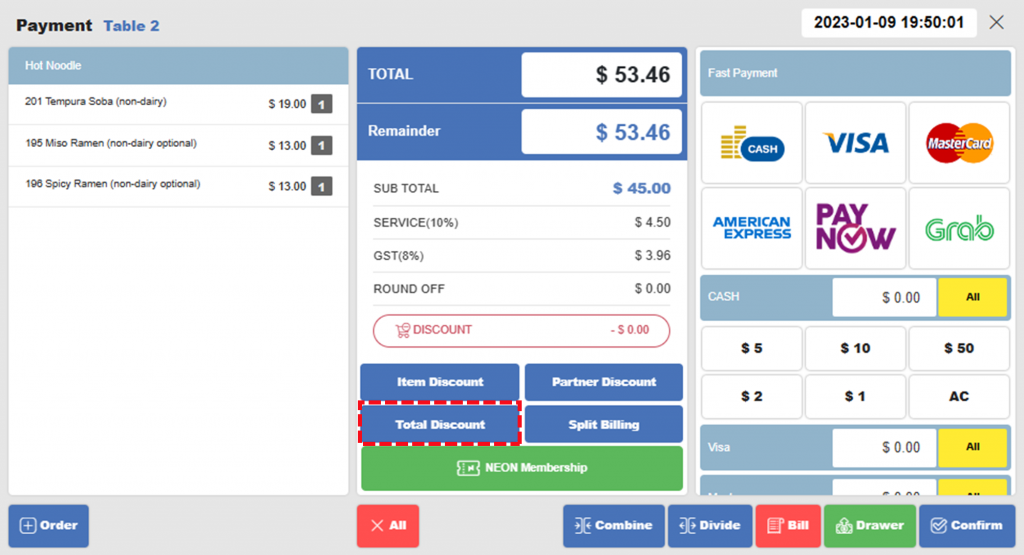
[2] Enter discount amount ($) or percentage (%) > Confirm (same as [2] of Item Discount)
[3] Total Discount is applied.
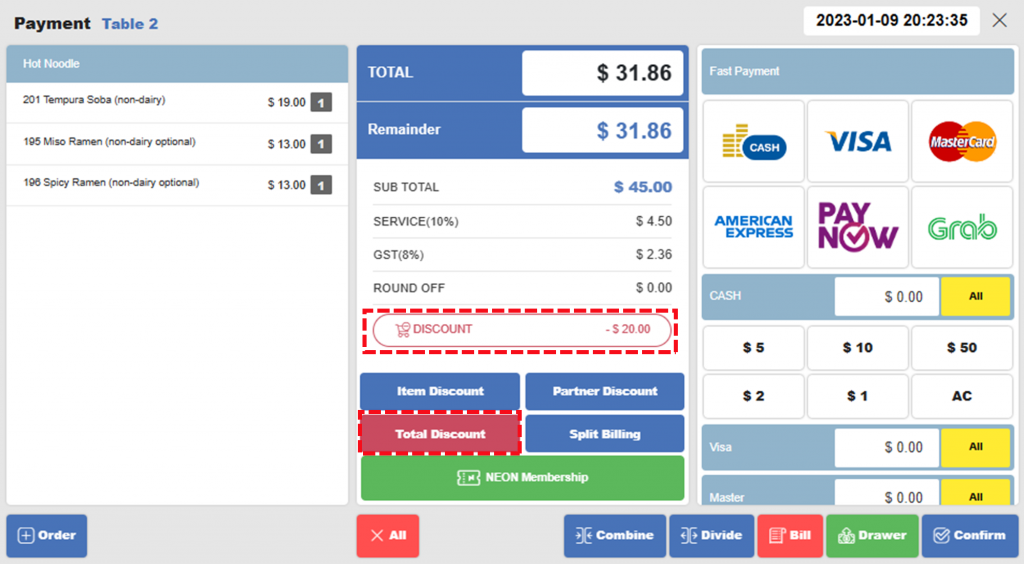
| Notes ◾Giving a discount in %: Discount will be applied to Sub Total before Service Charge ◾Giving a discount in $: Discount will be applied to Sub Total after Service Charge |
Discount Group
Discount Group is a discount for a specific group. One example is that the restaurant had a partnership with a local company that the company’s staff can enjoy 10% discounts.
[1] Click Partner Discount on Payment screen.
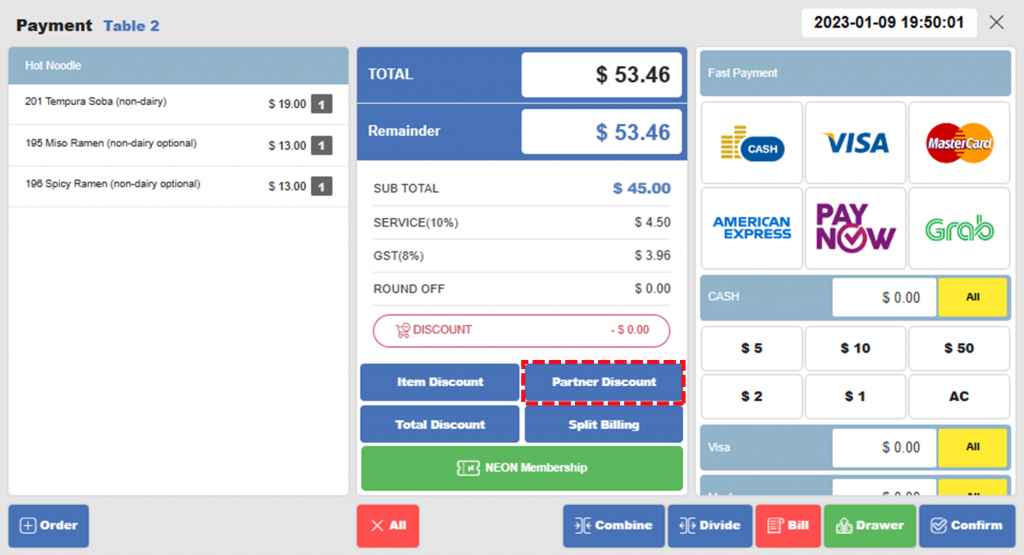
[2] Select group for discount.
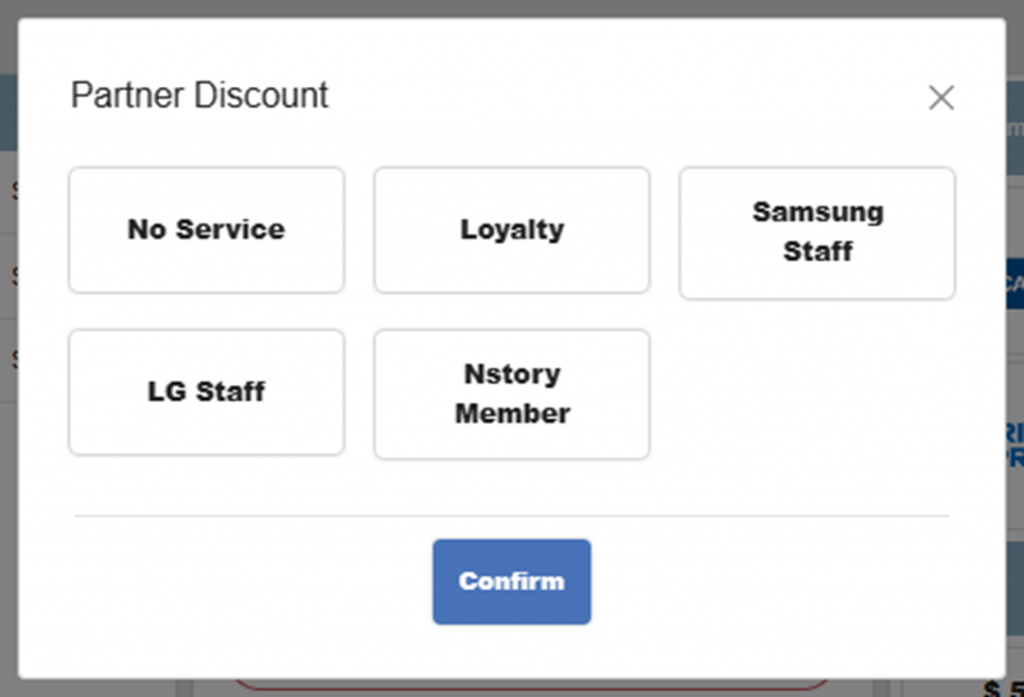
| Notes If a partner discount type is not available, check with your manager. |
| Notes: Discount and split billing Customers may want to split the bill after getting discount. In this case, it is recommended to apply discount before Split Bill. Otherwise, you should apply discount to each payment. |
Related Pages
◀️ Go back to NPOS Guide for Front Staff
Last updated on 22 Jun 2021.

One Reply to “Giving a Discount on Items”